Friday, December 30, 2011

52 Weeks of New Foods

For 2012, I want to make one new food (or recipe I've always wanted to make) each week. With the help of my Guinea Pig Taste Tester, I've come up with the below 52 foods and/or recipes. Some I've made before and want to make again in a stellar way and some are challenges. If you have amazing recipes or ideas, pass them along! :)

Happy cooking, my friends! :)


The List:

Veal Picctta
Babka
Emerl’s Christmas bark
New rutabaga recipe
Anything with buddahand
Anything with cumquat
Perfect martini
Chocolate-crusted pork tenderloin
Bacon-wrapped scallops
Scallops in white wine sauce
Chimichurri
One amazing appetizer
Sour cream cake
Shrimp creole
Shrimp scampi
Cole slaw
Chicken fried steak
Galuchie Egg Nog
Polenta
Red cabbage
Polish feast
Homemade artisan style pizza
Meatballs
Stuffed clams
Clam chowder
Perfect omelets
Red Wine Roasted Pears
Lobster Mac N’ Cheese
Meatloaf
Beef Wellington
Cinnamon Buns
Chicken Wings
Jam from Scratch
Roast Chicken
Risotto
Stuffing with Sausage
Gnocchi
Pesto
Potato Torte
Meringues
Butternut Squash soup
Pork Tenderloin
Flank steak
Soufflé
Marinara
Eggs Benedict
Sautéed spinach
Collard greens
Stuffed red pepper
Black bean burger from scratch
White chocolate macadamia nut cookies (soft on the inside)
Blueberry muffins

Tuesday, December 13, 2011

Fettuccine Al-fake-O

When I eat pasta, I eat pasta. I mean "bad for you pasta." Cream sauce- yes. Bacon- yes, please. White, not whole wheat pasta- pile it, baby.

Last weekend, I was playing NYC tour guide to my out-of-town relatives and brought my family to Alfredo of Rome- the "birthplace" of fettuccine Alfredo. Craving it since then, I set out for a new "lightened up" recipe. This recipe let me have my pasta and cream sauce without killing my calorie count or arteries.Enjoy! I did! 

Ingredients

  • About 3 cups of cooked pasta (I used angel hair)
  • 1 tablespoon extra-virgin olive oil
  • 4 cups sliced mushrooms
  • 2 cups thinly sliced Brussels sprouts
  • 3 cloves garlic
  • 1/2 cup dry sherry
  • 2 cups non-fat milk
  • 2 tablespoons all-purpose flour
  • 1/2 teaspoon salt
  • 1/2 teaspoon freshly ground pepper
  • 1 cup finely shredded Parmesan or Asiago cheese, plus more for garnish
  • Chopped plum tomato. fresh basil and scallions for garnish

Preparation

  1. Cook pasta in a large pot of boiling salted water until tender, 8 to 10 minutes. Drain, return to the pot and set aside.
  2. Meanwhile, heat oil in a large skillet over medium heat. Add mushrooms and Brussels sprouts and cook, stirring often, until the mushrooms release their liquid, about 8 to 10 minutes. 
  3. Add garlic and cook, stirring, until fragrant, about 1 minute. 
  4. Add sherry  to deglaze the pan, scraping up any brown bits; bring to a boil and cook, stirring, until almost evaporated.
  5. Whisk milk and flour in a bowl; add to the skillet with salt and pepper. Cook, stirring, until the sauce bubbles and thickens, about 2-5 minutes. 
  6. Stir in cheese until melted;gently toss. 
  7. Serve with more cheese, if desired, and top with scallions, basil and tomatoes.
Adapted from: http://www.eatingwell.com/recipes/fettuccine_brussels_sprouts_mushrooms.html  

Tuesday, December 6, 2011

Huevos Rancheros Made Weeknight Simple

Here is one of my absolute favorite recipes made with three main staples you likely already have in your home: black beans, eggs and salsa. It passes the weeknight test ("Can I come home exhausted, cook it in under half an hour and it will still taste great?") and tastes really fresh and healthy with the cilantro and scallions. This is a great meatless entree, a great protein blast for the end of your day (and good leftovers for breakfast if you have any!).

I serve this as is, but you can put over oven warmed tortillas to be more authentic.


Ingredients

  • 16-ounce jar salsa (2 cups)
  • 15.5-ounce can black beans, rinsed
  • large eggs
  • 1 Tbsp. Asian chili paste (or hot sauce of your choice) 
  • kosher salt and black pepper
  • 5 scallions, sliced
  • 1/4 cup chopped fresh cilantro
  • 1/2 cup sour cream

Directions

  1. In a large skillet, combine the salsa and beans and bring to a simmer. Once simmering, add chili sauce and stir.
  2. Make 4 wells in the bean mixture. Crack each egg into a small bowl and slide it gently into a well. Season with salt and pepper.(Some people also add a little bit of cumin here, but I skip this.)
  3. Cook, covered, over medium heat, 3 to 5 minutes for slightly runny yolks.
  4. Sprinkle with the scallions and cilantro. Divide among plates and serve with sour cream.
  5. If you can spare the extra calories, sprinkle with a bit of Mexican blend cheese.

Adapted from: http://www.realsimple.com/food-recipes/browse-all-recipes/skillet-poached-huevos-rancheros-00000000027548/index.html 

Tuesday, November 29, 2011

Brussels Sprouts Gratin

I've been on a savory side kick lately, but last night skipped the meat all together and went straight for the veggies! I tried this Brussels Sprouts Gratin recipe from Claire Robinson, one of my favorite chefs. I lightened up the dish by using less butter, reduced fat cheese and nonfat milk, but would make this again without trying to "skinny down" the recipe.(I did add a piece of crumbled bacon on top though, which I would do again!) Here's the recipe (full fat and all!):


Ingredients

  • 2 pints Brussels sprouts, trimmed, about 1 1/2 pounds
  • 3 tablespoons butter
  • 3 tablespoons unbleached all-purpose flour
  • 2 cups milk, at room temperature
  • Kosher salt and freshly cracked black pepper
  • 5 ounces Gruyere, grated (about 1 cup grated)


Directions

Preheat oven to 400 degrees F. 

Bring a large pot of salted water to a boil over medium heat. Add the Brussels sprouts and cook for 5 to 7 minutes, until bright green and beginning to soften. Remove the sprouts with a slotted spoon and drop into a bowl of ice water to stop the cooking process.

Make the sauce by melting the butter and flour together in a saucepan over medium heat. Cook, stirring, until smooth and bubbling, about 1 minute; slowly whisk in milk and continue to cook, whisking frequently, until thick and creamy, 2 to 3 minutes. Season the sauce well with salt and heavily with pepper.

Halve the Brussels sprouts through the core and put them in an even layer in a 2 quart baking dish. Pour the sauce over the sprouts and sprinkle the cheese evenly over the top. Bake in the center of the oven for 10 to 15 minutes until the top is golden and bubbling.

Thanksgiving Tablescape

Wednesday, November 23, 2011

Bacon and Butternut Squash Pasta


Last night after a three hour, rainy, cold bus ride home from the city, I wanted something gooey and delicious to help turn my night around. I'm playing the "save my calories for Thanksgiving" game, so I didn't want something that would be too filling or fattening. I found this recipe for Bacon and Butternut Squash Pasta in Cooking Light last year and decided to try it.Even though I had never worked with butternut squash before and had to teach myself how to properly break it down, this recipe was stellar and on the plate within half an hour. The blue cheese wasn't overpowering and the salty bacon balanced it well. For JUST under 400 calories, this worked wonders.

Ingredients: 

3 1/4 teaspoons salt, divided  
8 ounces uncooked fettuccine  (You can use less, I will next time)
2 bacon slices  (you can use more- haha!)
2 tablespoons butter  
3 cups (1/2-inch) cubed peeled butternut squash  
2 garlic cloves, minced
1/2 cup (2 ounces) crumbled blue cheese  
1/2 cup sliced green onions

Directions:  

Bring 3 quarts water and 1 tablespoon salt to a boil in a large saucepan. Add pasta; cook for 8 minutes. Drain in a colander over a bowl, and reserve 1/3 cup cooking liquid.

Cook bacon in a large skillet over medium heat until crisp. Remove bacon from pan, reserving 2 teaspoons drippings in pan. Crumble bacon; set aside. Add butter to drippings in pan; cook 30 seconds or until butter melts. Increase heat to medium-high. Add squash; sauté 7 minutes or until almost tender. Add garlic; cook 1 minute, stirring constantly. Stir in remaining 1/4 teaspoon salt, pasta, reserved cooking liquid, and cheese; cook 2 minutes or until pasta is al dente, stirring frequently. Sprinkle with bacon and onions.

One note: Be sure to put some oil from the bacon drippings on the pasta so that it doesn't congeal into a lumpy mess. I made this mistake on my first plate!  

Sunday, November 13, 2011

Coming Soon....

Yes- my food blog needs some loving! I've been busy combing through my favorite websites, magazines, cookbooks and new recipe collections looking for healthy, hearty and fresh recipes so stay tuned for some exciting new options!

In the meantime,here's a link to a new ground turkey comfort food one skillet dish that I created on Wednesday: Stovetop Cheesy Turkey Delight.

Enjoy!

Monday, October 17, 2011

Two New Fall Recipes: Pumpkin Ravioli with Sage Butter and Cranberry Beef Stew

This past weekend, I spent the weekend at my mom and dad's house totally relaxing and reconnecting to family. To "celebrate" the beautiful fall weather, I made two autumn recipes and was pleasantly surprised by both!

On Saturday after a long day of running around, I wanted something savory and special so I decided to try 
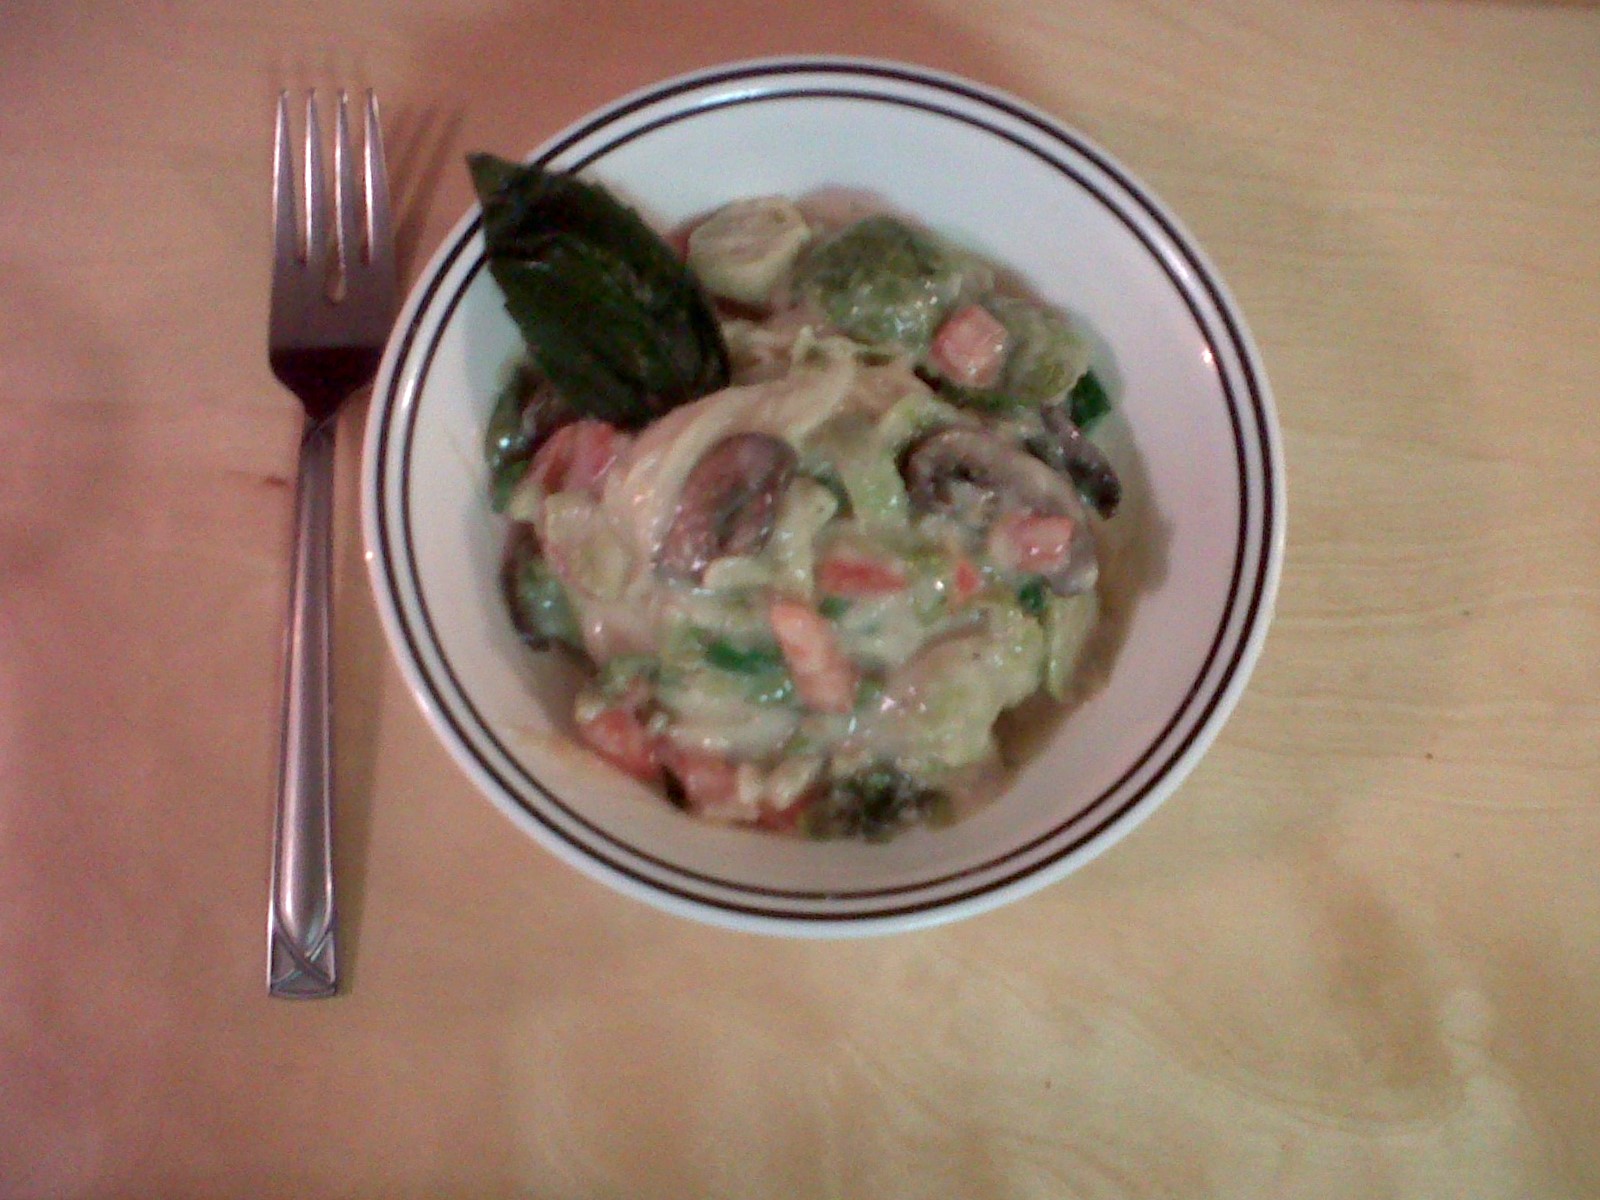
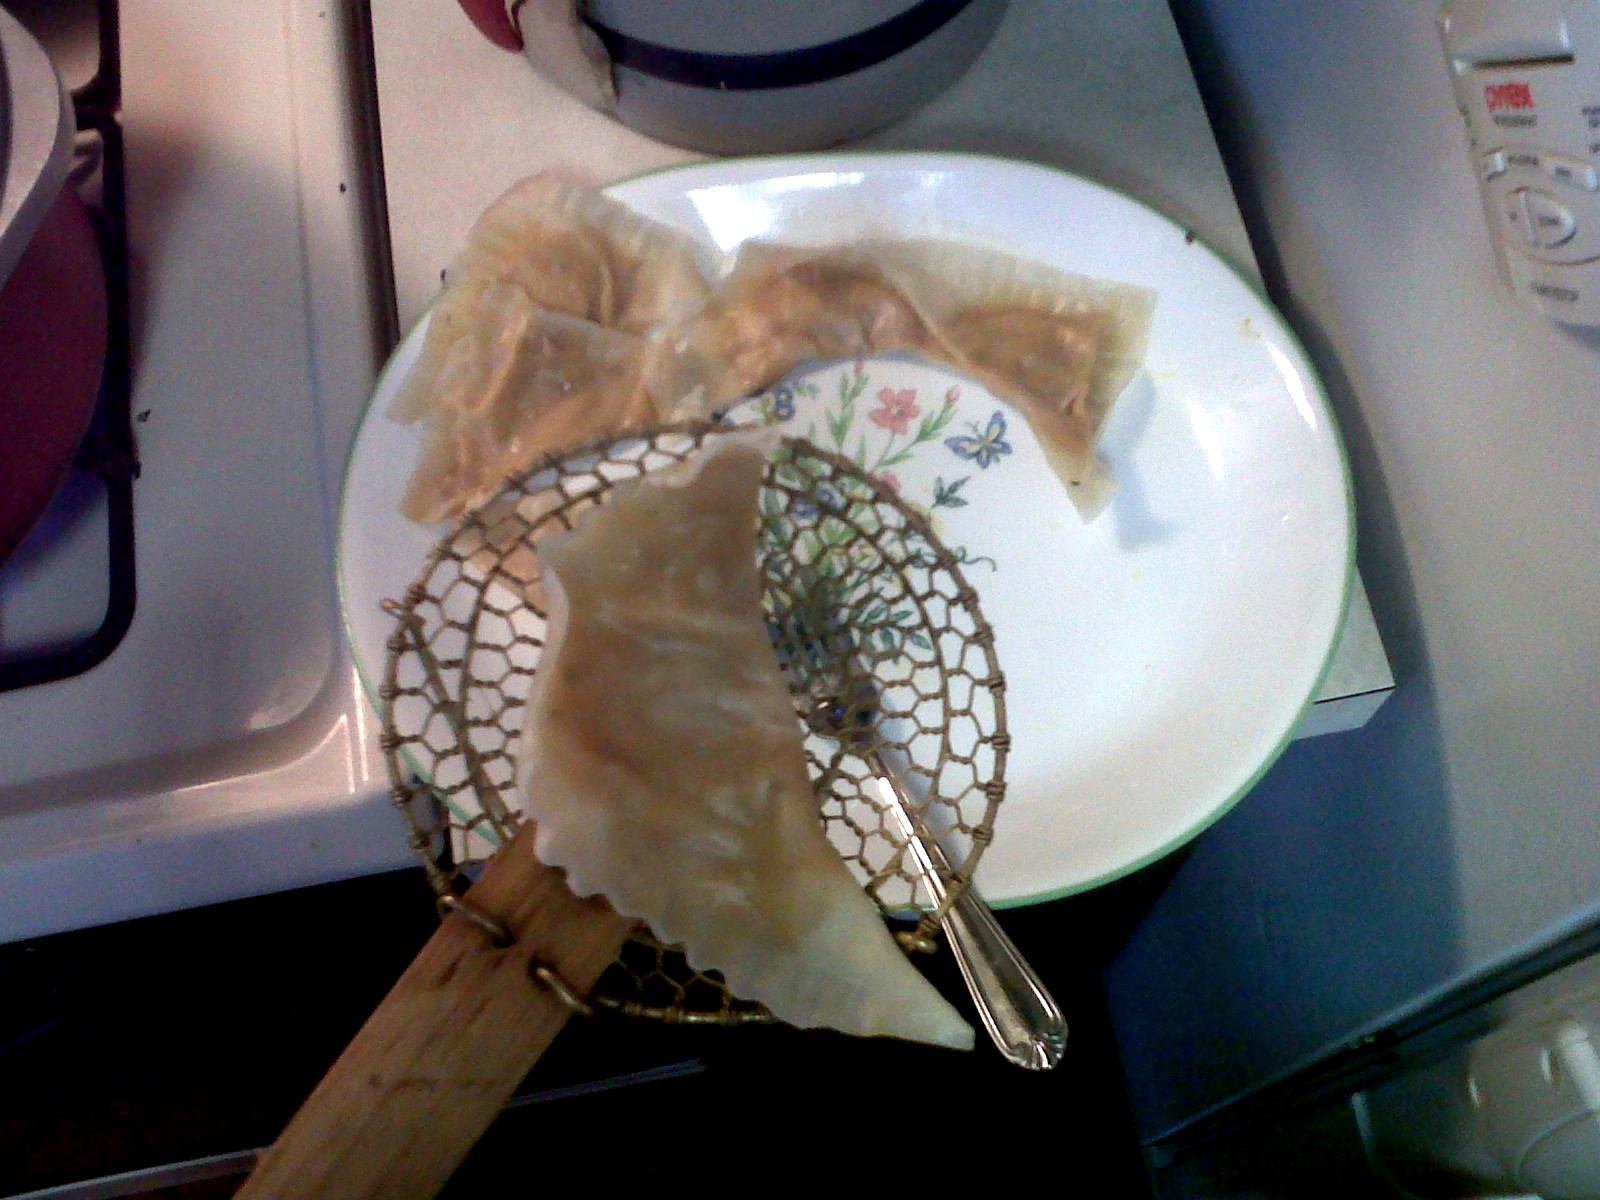
Pumpkin Ravioli with Sage Butter. The raviolis, while made with premade wonton wrappers, took forever to make and I was getting frustrated, but they were worth it in the end. The fresh sage adds an earthy taste to the dish and balances the sweet pumpkin ricotta filling. Next time, I may make this more savory by adding more Parmesan and less mozzarella, but for a first try, these were pretty good! Beware- the recipe makes a lot more filling than needed. (The recipe is supposed to make 36 ravioli.) I'll also use the sage butter over chicken or fish. MMMM!

Ravioli Ingredients: 

3 1/2 cups canned pumpkin puree (1 big can)
1 (15-ounce) container whole ricotta cheese
1/2 cup shredded Parmesan cheese
1 1/2 cups mozzarella
1 tablespoon minced fresh sage
1 teaspoon ground nutmeg
1 teaspoon salt (I used more)
1 tsp cinnamon
2 tsp garlic powder
1/4 teaspoon white pepper
Brown sugar to taste
36 small wonton wrappers, at room temperature

Sage Butter Ingredients:

8 tablespoons (1 stick) butter
16 small fresh sage leaves
1 teaspoon minced garlic
1 cup chicken stock or reduced salt broth
Salt and pepper to taste


Directions:

For the ravioli: In a large mixing bowl, combine pumpkin, ricotta, Parmesan, mozzarella, parsley, sage, nutmeg, salt, garlic powder, white pepper and brown sugar and mix well. Place 1 heaping tablespoon of the filling between in the center of the wonton wrapper. Dampen edges by moistening fingers with water and running along the edges and seal well. into a tiny triangle and press sides with a fork to ensure sealing. Drop ravioli into salted, simmering water; remove when ravioli floats to top, about 3 minutes. Remove with a spider and place on platter. (Cooked raviolis will stick together! Be careful!)

For the sage butter: Melt butter in a saute pan over medium-high heat. Add sage leaves and minced garlic; saute for about 30 seconds. Slowly add chicken stock. Add salt and pepper to taste.

Place raviolis in single layer on a platter and pour butter sauce over ravioli. Garnish and enjoy! 


On Sunday, I wanted down home comfort food and tested the Autumn Berry Cranberry Beef Stew from Health Magazine. The stew was similar to one my mom made growing up, but the cranberries gave it a new twist. This could easily be made in the crock pot, but 3 hours simmering on the stove did the trick this time.
Next time, I'll add more vegetables and another can of cranberry sauce. Delicious!! (And even better the next day for lunch!)


Ingredients:
  • 1 teaspoon dried thyme
  • 1/2 teaspoon salt
  • 1/2 teaspoon freshly ground black pepper
  • 1 (3-pound) boneless chuck roast, trimmed and cut into 2-inch cubes
  • 1 T olive oil
  • 1 cup chopped onion
  • 1 cup fat-free, less-sodium beef broth
  • 2 bay leaves
  • 1 (12-ounce) Guinness Stout
  • 1 (10-ounce) package frozen pearl onions, thawed
  • 1 (8-ounce) package button mushrooms, quartered
  • 1/4 cup water
  • 2 tablespoons all-purpose flour
  • 3/4 cup whole-berry cranberry sauce
  • 8 cups cooked egg noodles (about 1 pound)
  • Chopped fresh thyme (optional)
Directions:


Combine the first three ingredients in a small bowl; sprinkle over beef. Heat a pot to medium-high heat and coat with cooking spray. Add beef to pan; cook 6 minutes, turning to brown on all sides. Add chopped onion, broth, bay leaves, and stout; bring to a boil. Cover, reduce heat, and simmer 3-4 hours or until beef is tender, stirring occasionally. Stir in pearl onions and mushrooms; cook, covered, 15 minutes, stirring occasionally.

Combine 1/4 cup water and flour in a small bowl. Add flour mixture and cranberry sauce to pan. Cook for five minutes. Discard bay leaves. Serve with noodles. Garnish with fresh thyme, if desired.

Tuesday, October 11, 2011

Skinny Recipe: Penne Alla "Not-Ka"

I had to share this recipe from the Lifetime show "Cook Yourself Thin." I was vegging out in front of the TV at Guinea Pig's house a few weekends ago (in between football games, of course!) and came across this show. The show itself is super cheesy, but the recipes sounded delicious and easy, so I printed out a ton from this website to try. (So expect more skinny recipes soon!)

I made this Penne Alla "Not-Ka" last night and it really exceeded my expectations! The dish tasted really fresh thanks to the generous addition of basil at the end of the cooking process and didn't feel as heavy as "real" Penne Alla Vodka sauce. I served mine over spaghetti squash instead of pasta to cut down on calories and help me meet my "5 a day" (which never seems to happen anymore!" I'll certainly make this again: easy on a weeknight, delicious and simple!

Serves 4
Calories per serving: 371


Ingredients:
2 teaspoons olive oil, plus extra for serving
3 cloves garlic
1/2 cup chopped red onion
3/4 teaspoon salt
1 14-ounce can diced tomatoes or whole tomatoes in juice, pureed in a food processor
Pinch red pepper flakes
8 ounces penne
1/4 cup heavy cream
6 tablespoons evaporated nonfat milk
1/3 cup grated Parmesan cheese
1/4 cup shredded fresh basil
1/8 teaspoon black pepper

Directions: 

1. Bring a large pot of salted water to a boil for the penne.

2. In a large saucepan, heat the 2 teaspoons oil with the garlic over low heat until the garlic begins to brown, about 3 minutes. Add the onion and 1/4 teaspoon salt, cover, and cook until the onion is softened, about 2 more minutes. Add the tomato, 1/2 teaspoon salt and the red pepper flakes. Bring to a simmer, reduce the heat and simmer very gently 10 minutes. Stir in the cream and evaporated milk and simmer 1 more minute.

3. Meanwhile, after the sauce has cooked 5 minutes, add the penne to the boiling water and cook until just shy of al dente, about 6 minutes. Drain, reserving about 1/2 cup pasta water. Add the drained penne to the saucepan and simmer until the penne is al dente, 1 to 2 minutes, adding a little of the pasta cooking water if the mixture is dry. Stir in 1/4 cup of the Parmesan, along with the basil and black pepper.

4. To serve, divide pasta among 4 serving bowls. Drizzle each serving with 1/2 teaspoon olive oil, and sprinkle with the remaining Parmesan.

Photo and recipe credit here. 

Monday, October 3, 2011

Sesame Peanut Noodles

Mmmm! Another "Cook Yourself Thin" recipe I tried out a few weeks ago- Sesame Peanut Noodles.

When I'm too busy to pack my own lunch, I run downstairs to the Guy & Gallard where they have these amazing prepackaged sesame peanut noodles. I thought I wasn't being terribly bad when I grabbed them, but when I looked up the nutritional information, I was floored! Those little strands of deliciousness pack a mean fat punch! I decided to do some research and try to find a better recipe.

This one, from Lifetime's Cook Yourself Thin, is loaded with veggies and doesn't kill your diet for the day by lunchtime. The jicima is a different flavor (but heads up: pain in the butt to peel!) and adds crunch and the apples are PERFECTLY in season this time of year.

A word of caution: play around with the cilantro and lime combination. I found this recipe to have too much cilantro and not enough lime.

Ingredients:

For the noodles
8 ounces whole-wheat spaghetti

For the dressing
2 tablespoons rice vinegar
1/4 cup low-sodium soy sauce
1/4 cup peanut butter
2 tablespoons grated ginger
1 tablespoon dark sesame oil
1 teaspoon brown sugar
1 lime
1/2 cup hot water

For assembling
1/2 bag store-bought coleslaw mix
1/2 cup red pepper
1/2 cup cilantro, chopped

1/2 lime, squeezed
1/2 cup apple
1/2 cup jicama
1 teaspoon toasted sesame seeds
2 scallions, julienne
1/2 cup dry-roasted peanuts, for garnish
Cilantro, chopped, for garnish
Lime wedges, for garnish


Directions:
1. Bring a pot of water to a boil for the pasta, and cook the pasta according to package instructions. Drain and run under cold water.

2. To make the dressing, combine all the ingredients into a small mixing bowl and stir together with a whisk. Add the dressing to the pasta and toss. Stir in the coleslaw mix, red pepper and cilantro. Squeeze a half of a lime over the mixture, and toss.

3. Add the remaining ingredients, toss and refrigerate for one hour. Garnish with peanuts, cilantro and lime wedges. Serve.

Wednesday, September 14, 2011

Pretty Darn Close: Asian Ginger Wagyu Beef Lettuce Wraps

I'm a big fan of recipes that try to replicate restaurant classics, especially when they come out close to or better than the real thing. Last night, I decided to try and recreate the lettuce cups from P.F. Chang's. I had these for the first time with my aunt when they first came out years ago and have loved them ever since! This recipe is a VERY close second, and knowing I made it at home (and knowing exactly what went into it and that fresh, quality ingredients were used) helped me feel better about keeping healthy. Plus, low carb at night helps my stomach look a teeeeeeeensy bit flatter in the morning. ;)

The trick to this recipe is the vinegar/soy cocktail poured over the meat at the end. It gives it complex flavor while adding the perfect amount of tang.

Ingredients

1 pound Wagyu beef (or any lean ground beef)
2 teaspoons olive oil
1 large onion, chopped
3 cloves fresh garlic, smashed
1 tablespoon soy sauce, plus one tablespoon reserved
1/4 cup hoisin sauce
3 tablespoons minced pickled ginger
1 and 1/2 tablespoons rice vinegar (I used rice vinegar, but you can use rice wine vinegar too. What's the difference?), plus 2 tablespoons reserved
2 teaspoons Asian chili pepper sauce
2 (8 ounce) cans water chestnuts, drained and chopped
1 bunch scallions, chopped
2 teaspoons Asian (dark) sesame oil
Peanuts, chopped
2 carrots, cut into matchsticks
1 head iceberg lettuce

Directions

In a nonstick skillet, brown the beef (Wagyu beef cooks quickly!). Transfer the beef to a bowl and keep warm while you make the sauce.

In the same pan, add the olive oil and saute the onion until slight;y translucent. When the onions are limp and nearly cooked through, add the garlic and sautee for about 2 minutes, until fragrant.

To the onion and garlic, add soy sauce, hoisin sauce, ginger, rice vinegar, and chili pepper sauce to the onions, and stir to combine. (You can add water here if you want your sauce a bit thinner.)

Stir in water chestnuts, scallions and sesame oil and allow to come to a slow simmer.

Once slightly bubbling, add the browned ground beef and stir to coat. While this is heating through, mix your reserved rice vinegar and soy sauce in a small bowl.

**Most important part!** When everything is combined and heated through, pour the soy/rice vinegar mixture over the meat.

Wash and pat the lettuce dry and then peel the lettuce to reveal little lettuce "cups." Arrange the lettuce cups on the plate, with matchstick carrots and other veggie toppings of your choice on the side. Put the meat in the center of your plate and garnish with chopped peanuts. I serve this dish with additional soy and rice vinegar in a cup on the side, but you can also serve with asian chili sauce, soy sauce, spicy mustard sauce or hoisin sauce. Spoon the meat mixture into a lettuce cup, add your toppings and enjoy!


Adapted from: http://dinnersforayear.blogspot.com/2010/09/crispy-beef-lettuce-wraps.html

Tuesday, August 30, 2011

My First Lasagna

More new recipe posts coming soon after a weekend full of cooking. (What else is a girl to do when she's stuck inside during a hurricane?) Thankfully, we had power the entire time!

Monday, August 8, 2011

Best Ever Lunch


God I love not working! (I have a week of in between jobs and plan to spend most of it cooking.) 

Seared filet mignon with melted gorgonzola cheese, bacon and gorgonzola mashed potatoes and sauteed green beans. A-mazing (and another 10/10 for the potatoes on the Guinea Pig scale!) 

Not a dieter's delight, but oh so worth it!  

Wednesday, August 3, 2011

Super Easy Dinner Alert: Chicken Christmas

Chicken Noel, or Chicken Christmas as my Guinea Pig likes to call it, is a comfort food dinner (unless you lighten it up like I do) that is quick, easy and tastes like you've spent more than just 25 minutes preparing it. I have this on fall and winter weeknights (yes, it is midsummer, but hey!) when I know I really should cook something for myself instead of calling the local pizza place or settling on a "wine dinner" - haha. Five pantry staples and a few minutes later and you're in action.

I use this as my jumping off point and then add whatever I have on hand that night/week to spice it up- vegetables, cheese, spices. Fresh mushrooms are excellent in this! Get creative and tell me what worked for you.

Ingredients:

4 boneless skinless chicken breasts (cubed or shredded, however you like)
1 can of cream of mushroom soup (go ahead and get the light/98% fat free if you want to be good!)
1 cup sour cream or plain nonfat yogurt (I use whichever I have on hand; again use fat free if you want)
1/2 cup of cooking sherry
Paprika

Directions:

In a small bowl, combine the soup, sour cream/yogurt and sherry. Whisk.

Season the chicken breasts to your liking (I actually made this one time with Montreal Chicken Seasoning and it was great!) and place in a lightly sprayed 9x13 pan.

Coat the chicken with the liquid mixture and sprinkle with paprika.

[Add in any "extras" after the chicken is coated.]

Bake at 350 for an hour and serve over rice.


Recipe adapted and photo borrowed from http://www.bluefeathermedia.com/table-talk-chicken-noel.

Monday, July 25, 2011

Baked Shrimp with Tomatoes and Feta

I've been combing thorough my favorite recipe books and websites in search of some new recipes that incorporate more proteins than I'm used to cooking. I've been trying to run more and want to build muscle in my legs faster so I'm trying to up my intake. (And having three brothers that are all super into lifting, strength training and protein shakes is a good motivator!)
This dish was simple to prepare and really unexpected! The garlic panko crumbs make this dish and I will use the panko "soaking" method whenever a recipe calls for bread crumbs or panko again. The feta was just strong enough to make the dish savory and decadent, but was not overpowering.

I would absolutely make this again and think I'll play around with this as an appetizer for dinner parties! Look at that perfectly golden crust!


Ingredients

2 tablespoons butter
2 tablespoons olive oil, plus extra for baking dish
4 garlic cloves, chopped
1 cup panko
1 1/2 pounds shrimp, 21 - 25 per pound, peeled and deveined
1/4 teaspoon salt
1/4 teaspoon pepper
1 (15-ounce) can fire roasted tomatoes, drained
1/2 cup feta, crumbled
10 fresh basil leaves, chopped

Directions

Preheat oven to 450 degrees.

In a small saucepan over medium heat add butter and olive oil.  When butter begins to just bubble, remove the pan from the heat and add the garlic.  Let sit for 3 - 5 minutes.  Add the panko and stir to combine.  Set aside.

Brush a 9-inch baking dish with a little olive oil.  Add the shrimp and sprinkle with the salt and pepper.  Top with the tomatoes, then the garlic panko and sprinkle the feta.  Bake for 12 minutes or until the shrimp are just cooked through.  Remove from oven and top with the basil.

I sincerely wish I could take ANY credit at all for this recipe, but it's yet another from my favorite blog.

Monday, July 11, 2011

Peanut Butter Hummus

Before hummus became an "in" snack, we had already been eating it for years! My dad likes more interesting foods and we grew up with delicious, but not yet "in" things like homemade hummus, fresh gazpacho (I still need to get his recipe for this) and liverwurst. (I think I liked that until I knew what it was.)

I had a container of plain yogurt in the fridge from the Oriental Chicken Salad I made last week and always have cans of chick peas and fresh lemons on hand, so I thought I'd try hummus. When I made this "lightened up" dish, it tasted exactly like the one we had growing up. The peanut butter is a really great substitue for tahini (sesame paste). I'd take this over the Sabra brand anyday.

Ingredients:

1 can chick peas, drained and rinsed
1/2 cup plain nonfat yogurt
2 tsp. creamy peanut butter
2 tsp olive oil
3 cloves garlic
1 tsp Kosher salt
Juice of one lemon
1/8 tsp allspice

Directions:

Put everything into a food processor or Magic Bullet and blend until creamy and thick. Adjust spices accordingly.

Sunday, July 10, 2011

Oriental Chicken Salad

I was looking for a fresh and healthy lunch that would keep me full for hours. I dug out one of my mom's old Weight Watchers cookbooks (disclaimer: Mom has never been on Weight Watchers! She loved the fresh salsa recipe and my brother gave her the cookbook for Christmas years ago.) and started tagging pages left and right.There are so many fast, healthy and different recipes in this cookbook!(Be prepared for multiple Weight Watchers recipe postings!)

I found an Oriental Chicken salad with red bell peppers and a peanut butter "dressing" that I thought would be good, and I was right. I served this over romaine lettuce, but next time I think I'd try this over a Napa cabbage instead.


It was colorful, refreshing, different, but still felt sort of like a guilty pleasure. This is a good summer picnic food if you can keep it cold long enough. See what you think!

Ingredients:

3/4 cup plain nonfat yogurt
1 T creamy peanut butter (use full fat for the most flavor)
1 T rice wine vinegar
1 t Asian sesame oil
1 garlic clove, crushed
2 cups cooked chicken breast, shredded
6 scallions
1 red bell pepper, chopped
1 8 oz. can water chestnuts (don't skip this- it really added texture)
handful of Chinese noodles
Salt and pepper to taste
Lettuce (or cabbage)

Directions:

Combine the yogurt, peanut butter, oil, vinegar, sesame oil, garlic, salt and pepper with a food processor or Magic Bullet.

In a separate bowl, combine the red bell pepper, chicken, lettuce (or cabbage- whatever you are using), water chestnuts. When the "dressing" is blended, pour over the veggie mixture and separate into portions.

Dress each portion with scallion and Chinese noodles.

Friday, June 24, 2011

Roasted Chick Peas

I've been on a quest in the past years to find "better for you" sources of protein to cook with. I don't love red meat, and chicken can only be so exciting. I'm a vegetarian by no means, just choose to eat a lot of fish, beans and soy instead. I think there are more flavor combinations with those sources anyway!


I've been hearing so many things about chick peas lately and had seen a few variations on roasted chick pea recipes, so I decided to give it a try last night.

These a good, crunchy, smoky and an healthy treat. They're super easy and travel well. I'll make these again!

Ingredients

  • 1 (12 ounce) can chickpeas (garbanzo beans), drained and rinsed
  • 2 tablespoons olive oil (or PAM)
  • Kosher salt
  • Pepper to taste
  • Paprika to taste

Directions

  1. Preheat oven to 450 degrees F
  2. Dry chickpeas as much as possible with a paper towel . In a bowl, toss chickpeas with olive oil and seasonings.
  3. Spread on a baking sheet, and bake for about 40 minutes, until browned and crunchy. (I shook the pan around every few minutes to ensure all sides were browned and crunchy.)
  4. Adjust seasonings once cool and enjoy!

Monday, June 20, 2011

Three Ingredient Pulled Pork

I love crock pot recipes, but am always skeptical of ones that only call for a handful of ingredients. I was in the mood for something different, filling, and comforting and came across this Cola Pulled Pork Recipe. I popped everything in the crock pot, let it cook on low for 10 hours and then viola- pulled pork sandwiches for a very grateful Mom and Dad.

I found the recipe a bit dry, but super flavorful. When I "pulled" the pork, I added some BBQ sauce, a few shakes of Liquid Smoke and a little Tobasco to give it some additional kick. I also served this with a heaping spoonful of Mom's coleslaw on top and a big bowl of fruit on the side. It was like a little picnic!

I saved some of the shredded pork for tacos or quesadillas for later in the week (just mix with peppers, onions, chilis and some salsa, cheese and sour cream and press in the panini maker) and froze some for when Guinea Pig visits and says I never have food in my fridge. (He is correct. When I cook, I cook for one usually, so most of my food is in the FREEZER, not the fridge!)

Ingredients
  • 1 (3- to 4-lb.) boneless pork shoulder roast (I used a nearly 5 pound Boston butt), trimmed of fat and "silver stuff"
  • bottle barbecue sauce
  • 1 20-oz. can cola soft drink (I've read differing things here about using diet pop or not. I didn't use diet, but would be anxious to see what it does differently.)
Directions 
  • 1. Place roast in a lightly greased slow cooker; pour barbecue sauce and cola over roast. Cover and cook on low for 8 to 10 hours or until meat shreds easily with a fork.
  • 2. Transfer pork to a cutting board; shred with two forks, removing any large pieces of fat.
  • 3. Season to taste.
The best part? Look how clean the bone is! Nothing wasted!

Adapted from: http://www.myrecipes.com/how-to/7-ways-with/7-ways-with-cola-00420000004555/page8.html

Monday, June 13, 2011

He cooks!

A quick post to prove that Guinea Pig COOKS! He made this cheeseburger this weekend while we were down the shore. I nearly fell backwards, but he informed me he has grilled burgers before. This was news to me and I promtly requested he learn to grill steaks and ribs. I will not hold my breath.

Friday, June 10, 2011

Sissy's Chicken Pomodoro

See, see? I did cook this week! :) It's been a busy week, but on Monday I wanted something gooey and delicious but still semi-healthy. My "sissy," as I call her, also known as my dear friend Andrea, recommended this Chicken Pomodoro recipe. She's served it at dinner parties and said every single time, someone has asked her for the recipe. I added lots of fresh veggies and some water to thin the sauce, but next time I think I'll forgo being healthy and make the recipe as is. The veggies really changed the flavor. Still, quick, easy, spicy and gooey! I liked the spice, but my dinner guest couldn't handle it. (OK, maybe I added more than 1 tsp of the red pepper.) ;)

Ingredients:
1 T olive oil
boneless skinless chicken breasts 
4 cloves garlic, minced
1 tsp.  crushed red pepper
1 can (14-1/2 oz.) diced tomatoes, undrained
1 c. broccoli florets
1 green pepper, chopped into large pieces
1/2 c. frozen peas
4 oz.  (1/2 of 8-oz. pkg.) PHILADELPHIA Cream Cheese, cubed
1 cup Shredded Mozzarella Cheese
2 Tbsp. Grated Parmesan Cheese
2 Tbsp.  chopped fresh basil

Directions:

Cook the chicken. (I cooked the chicken by baking it in the toaster oven for 30 minutes to avoid the fat of the olive oil. I seasoned it first with Montreal Chicken Seasoning for some kick and used Pam Olive Oil Spray.)

While the chicken is cooking, prep the veggies and smash the garlic.

Add the olive oil to a nonstick pan, and sautee the garlic and crushed red pepper for 2 minutes. When the garlic is fragrant, add the veggies and cook until tender. (I added some water here to help steam them.) When the veggies are almost done, add the diced tomatoes.

Once the veggie/tomato mixture is heated through, add the cream cheese, Parmesan and basil. Mix. (The mixture will thin out as it cooks.)

Add the chicken and mozzarella to the pan and let cook until bubbly. Taste, and season as necessary.

Serve over your favorite pasta. I used whole wheat farfalle. Just remember that the pasta sucks up the sauce very easily, so avoid adding the pasta to the mixture in the pan!

Tuesday, May 31, 2011

Holy Delicious Tofu

I had never worked with tofu before, but had always wanted to try cooking with it. Coming off a weekend where all I ate was chips, hot dogs, hamburgers, lobster ravioli and ice cream cake, I was ready to cleanse and get back to eating healthy. (Ok so being in a bikini after not seeing the inside of a gym in the last few months might also be a reason.) I had had tofu a few times in college and wasn't really a fan, I always thought it was too mushy and spongy. I did my research and chose my first attempt tofu recipe well; this is amazing!!!! I thought I was going to take a few bites, gag, and blog about hating tofu, but just the opposite. The tofu was cooked very well (crispier outside with a softer center), and the sauce is delicious. I served this over brown rice, but I think I'd stick to bok choy or another green next time. I think I'd actually pay for this if I went to a vegan restaurant.

Ingredients

1 lb firm firm tofu, cut into cubes (I read that you should always press your tofu, so I put mine between two plates and put a 3lb. weight on top of it to take some of the water out. This helps it crisp better.)
2 tbsp olive oil (Note: you can also use a nonstick pan and just put the tofu directly on the hot pan. This too helps the tofu to crisp on the outside and have a more soft inside. I used the oil, which was soaked up quickly.)
8 Shitake mushrooms, sliced
3 cloves garlic, minced
1 tbsp fresh ginger, grated (I'm not sure this would taste as good if you didn't use fresh ginger!)
1 T Asian chili paste
1/8 cup maple syrup
1/8 cup soy sauce
2 T lemon juice
1/4 cup slivered almonds, chopped (garnish)
3 scallions, chopped
Directions

In a medium saucepan on medium-high heat, saute the tofu and mushrooms in oil until the tofu is browned and the mushrooms are a bit wilted. (This took me about 15 minutes. I really watched the tofu and kept "flipping" the pan because I didn't want it to over crisp.) Reduce heat to medium-low and add the garlic, ginger, and chili paste. Saute for 5 minutes. Add the maple syrup, soy sauce, and lemon juice. Cover and cook until the liquid has evaporated. Garnish with almonds and scallions.

In the future, I think I'd save a little of the sauce if I put this over rice again. It was just a tiny bit dry.

Adapted from: http://www.eatmedelicious.com/2007/06/tofu-magic.html.

Tuesday, May 17, 2011

Weeknight Marinara

In my experience, there are very few things more homey and comforting than a pot of sauce (or gravy, depending on how Italian you are or which part of NJ you are from) simmering on the stove. Not having a drop of Italian in us, my mom and I are constantly trying to perfect our sauces- trying different things, adding different ingredients that Italian people care to share and experimenting on our own.

My best friend, a true Italian through and through, taught me her "meatball and sauce" recipe, though I'll leave that up to her to share here if she feels so inclined. That takes a few hours, and I don't often have that time on weeknights.

I was so excited to see this recipe for marinara posted on one of my favorite cooking blogs and couldn't wait to try it. So with all of the ingredients already in my pantry, I set off to try what I'm calling my "Weeknight Marinara."

 Ingredients

2 tablespoons olive oil
1 onion, diced
4 garlic cloves, minced
1 (28 ounce) can peeled whole plum tomatoes, chopped
Kosher salt and red pepper flakes to taste (I used about 2 tsp of salt and 1T of red pepper flakes. Holy hotness!)
1 packet Splenda
3 T fresh chopped basil
2 T finely grated Parmesan (my best friend also taught me to add cheese to sauces to make them more flavorful and rich)


Directions

In a saucepan over medium high heat, add the olive oil and onion. Saute until the onions are translucent. Add the garlic and saute an additional minute until fragrant (that's when you know it's the right time to add the next ingredients and "stop" the cooking process).

Pour in the tomatoes and add the salt, red pepper flakes, and Splenda. Stir and bring just to a boil. Turn the heat down to a simmer, add the basil and continue cooking for about 20 minutes until ready to serve.

Run through blender or Magic Bullet if desired.
Adapted from: http://dinnersforayear.blogspot.com/2010/01/ricotta-gnocchi-in-flash.html (Note: I'm DYING to try this gnocchi, so stay tuned!)

Friday, May 13, 2011

Sanders Hot Fudge Cream Puff

I haven't updated in forever, I know, but we're gearing up for medical meeting season at work and the rest of my life seems to be getting in the way of my cooking. So for now, while I exist on Diet Squirt, Quaker oatmeal packets and frozen diet dinners (yes,it has come to that), I had to share this treat from my parents' hometown of Detroit.

Guinea Pig and I were there a few weekends ago for my cousin's wedding. I took him to Coney (an entry for another day!), and we split a Sanders hot fudge cream puff. This is the most delicious, gooey, creamy, smooth treat ever in life, and what girl doesn't need that on a Friday?

When my mom was working downtown, she used to stop in at Sanders at lunch to get one of these. Is she a smart woman or what? Look at this thing? MMMMMM!

Wednesday, April 20, 2011

Brazilian Black Bean Crockpot Dish

I had a revelation recently about cooking. I love love love love to crock pot cook, but I am always out much longer than the time it takes the dishes to cook! So my big revelation was "Why don't I crock pot cook at night?" I make the recipes the night before and by the time I get my 8-10 hours (Seriously. I require this) a night in, I have dinner made!

I've been dying to try this Brazilian Black Bean dish from one of my favorite websites- sparkrecipes.com- and thought this would be as good a time as any to try it. 

I thought this was a good recipe, but I served it over romaine with avocados. The next day, I brought premade portions of it over brown rice with cheese, tomatoes and sour cream for my friends at work (because this recipe already gave me literally 5 tupperwares full, which are already in my freezer!), which I liked much better. Next time, I think I'll serve this as a black bean quesadilla filling.  

Black beans are on Guinea Pig's "I hate" list, so he doesn't get to rate this, but my coworker Heidi loved it!

Here's the recipe:

Ingredients

16 oz. dry black beans
1 Green Pepper, chopped
1 onion, chopped
1 ham steak, cubed (the original recipe called for two chicken breasts, but I had none on hand and no desire to run out to grab them!)
2 cans of chicken broth (I also added 1 can of water)

Salt, pepper, and red pepper flakes to taste

Directions

Soak the dry beans for 24 hours in pan with enough water to cover the beans.

When you’re ready to assemble the recipe, drain the beans and put them in the crock pot. Then add the chicken broth plus one can of water, the pepper, onion, ham and seasonings. (I saw that some people added chilies to this to up the heat factor, but I didn’t.)

Cook on high for 8-10 hours.

That’s it! Then (and here’s the fun part), find your favorite way to try it! I loved the “rice and beans” variation, but pay around or feel free to borrow some of my ideas.


Recipe submitted by SparkPeople user DCMUM61.


Sunday, April 17, 2011

Chimichurri Scallops

Guinea Pig got a new job a few weeks and to celebrate, I decided to take him out to a little South American restaurant around the corner from his house called Cucharamama. I actually got a pasta dish (I wasn’t feeling very adventurous), but he got a wood-burning oven cooked steak with chimichurri sauce that he loved.

The first Friday after he started, we had both had very, very, very long weeks. I wanted to make something delicious and comforting to signify the end of the week, but it was Friday during Lent so my pork tenderloin AND my flank steak ideas were out. I settled on scallops and roasted artichokes. (The artichoke steamed somehow rather than roasted and was a disappointment. L) I served the scallops with my attempt at chimichurri sauce and jasmine rice.

To be honest, scallops weird me out a little. They taste amazing when done right, but if you overcook them even a tiny bit, it’s like chewing a rubber band. So I was a little nervous. But they turned out well! The recipe earned me an 8.5 on the Guinea Pig scale!

For the chimichurri sauce:

Ingredients

6 cloves garlic
1 tsp. Kosher Salt
1 tsp. oregano, dry leaves
1 tsp. black pepper, ground
1 tsp. red pepper flakes
Finely grated lemon zest from 3 lemons
4 oz. fresh lemon juice
1 bunch flat leaf (Italian) parsley (Careful here! I missed some stems, which ended up in my chimichurri!)
3/4 cup olive oil

Directions

Combine the garlic, salt, oregano, peppers, lemon zest and lemon juice in a food processor and blend into a paste.

Add the Italian parsley and pulse chop until parsley is 1/8 inch in size.

At this point, remove all of the ingredients from the processor and add the olive oil. (I added it to the food processor and it emulsified a little too much!)

Play with the seasonings a bit (I ended up adding more lemon), and allow the sauce to marinate for 30 minutes before serving, but the longer the better.


For the scallops:

Ingredients

2 Tbsp each of butter and olive oil
1 lb. large bay scallops
Salt and pepper to taste

Directions

Pat dry the scallops and let them sit a bit before they are seared. Scallops sear best when they are completely dry.
Once dry, salt and pepper each side of the scallops and let them sit for maybe 5-10 minutes before you cook them.
In a hot, nonstick pan, melt I Tbsp each of the butter and oil (it helps the butter not burn). Then add half of the scallops and cook for about 2 minutes on each side, depending on how thick the scallops are. I like to flip the first side after about 2-3 minutes, and then know they are “done” when they are semi-firm when poked with a spatula.
Keep the first batch warm (I used an aluminum foil tent) while you cook the second batch the same way.
Top with the chimichurri sauce and serve!

Friday, April 15, 2011

The Perfect "Diet" Cake!

E: "I'm making a soda pop cake for tonight."
H: "What the heck is a soda pop cake? I want that!"
E: "Are you kidding me? You've never heard of soda pop cake? You have to try it! I have to put it on the blog!"

My friend had never heard of soda pop cake- can you believe it? Probably, because the more people I ask, the more people I realize have not heard about soda pop cake! It's the most simple cake (especially for people like yours truly who seriously CANNOT BAKE), and it's calorie friendly(ish). Most of the time, the people I serve it to don't even know it's diet-friendly. It tastes like a very light angel food cake version of your favorite boxed cake mix.

The recipe couldn't be more simple:

1 store-bought cake mix
1 can of diet soda (for white/light cake mixes, I use diet Sprite or Sprite Zero, and for chocolate cakes I use Diet Coke or Diet Dr. Pepper. I can't wait to experiment with diet cream soda and diet root beer!)

Mix, and pop it into an oven following the directions on the box. I usually stick to 350 for about 20 minutes; these cakes tend to bake up a little quicker because they have less fat weighing them down.

I serve mine with Cool Whip Free and fruit when I feel like being healthy and buttercream frosting when I don't feel like it!

Tuesday, March 29, 2011

Garlic Balsalmic Soy Glaze

When I'm by myself, I try to eat fairly healthy. That way, I can eat what I want on date nights and on the weekend. I had a bunch of nice veggies from the farmer's market, so I decided to try a new salmon and veggie recipe that I dreamt up while I should have been working. I loved the flavor and savory garlic taste of the glaze over the veggies, but have to play with the type of protein that is best with this; I didn't love the salmon. Maybe next time, I will serve it with a white fish even over pasta.

I served this with a hearty red and a piece of Dove chocolate for dessert. :)

I roasted a double batch of the veggies, and will have the rest over pasta and homemade sauce tomorrow for lunch. I did the veggies in the toaster oven (single girl behavior!) so they weren't as crisp as I would have wanted, but great nonetheless.

Ingredients (salmon):

1 6 oz. salmon fillet, skin removed
24 stalks asparagus, cut into 2" pieces lengthwise
15 grape tomatoes, halved
1 shallot, sliced on the mandolin
1 onion, sliced on the mandolin
1 bunch fresh basil, chopped
2 garlic cloves, smashed
1 Tbsp olive oil
seasoning to taste (salt, pepper, crushed red pepper)

Directions:

Heat an oven to 400 degrees. In a bowl, combine the shallot, onion, garlic, asparagus, tomatoes, basil and olive oil. Add the seasonings to your liking.

Spray an aluminum foil-lined baking sheet with non-stick cooking spray, and evenly spread the veggie mixture over it. Put the salmon in the center of the vegetable mixture, making a "hole" in the middle of the tray with a spatula. Bake for about 15-20 minutes. (A note here- the salmon may end up being done before the veggies, but this depends on the thickness and size of the fish.)

Balsamic Soy Glaze

Ingredients:

2 Tbsp butter
1 Tbsp soy sauce
1 garlic clove, smashed
2-3 Tbsp good quality balsamic vinegar
1 Splenda packet (I use Splenda to cut the calories, though this is a fairly healthy dish)

Directions:

While the salmon and veggies are roasting, melt the butter in a saucepan. When the butter has melted, add the garlic clove and simmer about 3 minutes until the garlic has begun to cook through and your house smells delicious. Whisk in the soy sauce, Splenda, and 2 Tbsp of balsamic vinegar.

Let the mixture boil, and then turn to a simmer until the glaze begins to thicken (this won't get really thick). If you want a more sour than sweet flavor, add another Tbsp of vinegar and boil then simmer again. (Try it first!)

When the fish and veggies are done, transfer to a platter and pour the glaze over the veggies and the fish.

Saturday, March 19, 2011

Saturday Night Date Night In (And a potatoes au gratin recipe)

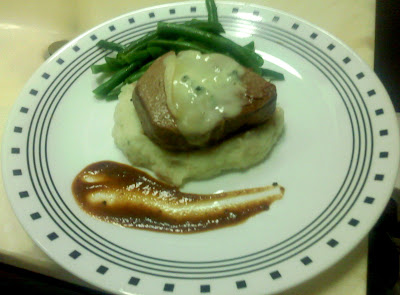
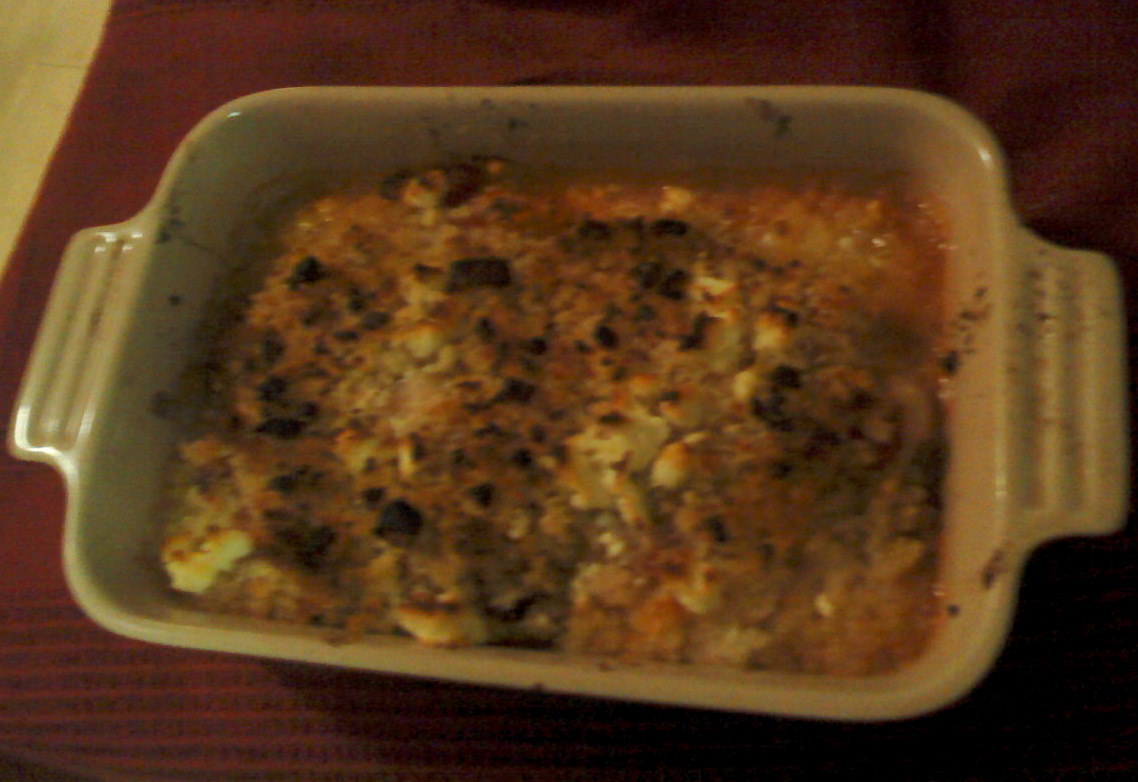
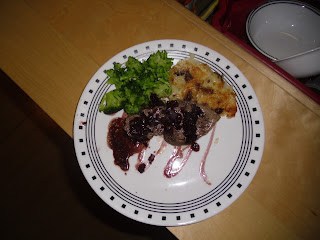
Instead of going out tonight, Guinea Pig and I decided to stay in and have a nice dinner here instead. I took the money we would have normally spent on a night out and had filet mignon with a Merlot Balsamic reduction, garlic steamed broccoli, and (I decided to spoil him) potatoes au gratin, which stole the show. My steak was a bit overdone (Guinea Pig liked his), and the broccoli was just okay, but I had to share this potato au gratin recipe! I got another 10 out of 10! Wah hoo! 

Ingredients
  • 5 potatoes, sliced on the mandolin
  • 1 large yellow onion (I also sliced this on the mandolin)
  • 4 Tbsp butter divided
  • 1 Tbsp flour
  • Salt
  • Black pepper
  • 1/2 teaspoon nutmeg
  • 1 cup (packed) grated Gruyere cheese (about 4 oz)
  • 8 Tbsp (packed) freshly grated Parmesan cheese (about 2 oz)
  • 2/3 cup 1% milk
  • Panko crumbs
Directions

Preheat oven to 400°F.

1 Boil the potatoes for 4 minutes in salted water. Drain and set aside.
2 Heat the butter over medium-high heat in a large sauté pan and cook the onions, stirring occasionally, until they are softened, about 5 minutes. Sprinkle them with salt, remove from heat, and set aside.
3 Spread half of the sliced potatoes over the bottom of a baking dish (I used 8 1/2 x 11). Sprinkle well with salt and pepper. Sprinkle a bit of the Gruyure and Parmesan cheeses. Top with the onions.
4 In another pan, heat 1-2T of butter. Once that is melted, stir in the flour  (as an aside, I think other herbs could work well here!) and make a roux. (Be careful not to burn the flour! I've done this too many times and it is not a quick fix!) Once the roux is brown and thickened, add the milk and stir quickly. Boil the mixture and then add the cheeses (save a little bit for the top) and nutmeg.   
5 Add the rest of the potatoes over the onions in the pan and pour the cheese mixture over all of the potatoes.
6 Sprinkle the remaining cheese over the potatoes.
7 Liberally sprinkle Panko crumbs over the top.
8 Bake uncovered in 400°F oven until cream thickens and everything is nicely browned, about 25-30 minutes.


In a Snap Potato Corn Chowder

Even though its close to 60 degrees this weekend, I promised a special lady that I would make her soup. She actually requested that I make her baked potato soup, but I wanted her to try my In a Snap Potato Corn Chowder first. I've made this soup multiple times, and have shared the recipe just as many! It's so comforting and simple, and you can top it with whatever you want. It's lower in fat and calories then real chowders because my recipe uses 1% milk and flour instead of heavy cream.

Ingredients

  • 3 tablespoons butter (you can use less)
  • 1 onion, diced
  • 1 stalk celery, minced
  • 1 garlic clove smashed
  • 2 teaspoons salt (I actually end up using more, but don't add until the very end)
  • 4 cups water
  • 5 potatoes, peeled and diced (the size doesn't matter, since you will blend this anyway) 
  • 4 cup frozen sweet corn kernels
  • 1/2 cup 1% milk
  • freshly ground black pepper
  • Toppings (I always serve this with lots of scallions, bacon and cheese)

Directions

In a stockpot or Dutch oven, melt butter over medium heat. Add onion, celery, and garlic. Cook for about 5 minutes or until onion and celery begin to soften.

Add water and potatoes. Bring to a boil, then reduce heat to low. Partially cover and simmer gently for about 15 minutes or until potatoes are soft.
Add the milk and stir. Use an immersion blender (or a real blender if you don't have an immersion blender) to blend the potato mixture to a creamy consistency that resembles watered-down mashed potatoes. Return the mixture to the pot. (If the texture is too watery, you can add 1T of flour and cook for another few minutes until the mixture thickens up a bit.)

Add corn and simmer for 5 minutes. If you're using scallions, chop them and add them in at this step. Season with salt and black pepper to your taste.

Ladle into bowls and garnish with cheese, bacon or whatever else you can think of. Get creative! Next time, I may add a dash of cayenne.


Adapted from: http://www.shape.com/healthy-eating/meals-and-menus/holidays-and-entertaining/holidays/easy-delicious-corn-potato-chowder

Wednesday, March 16, 2011

Sherry Shallot Cream Sauce

A few weeks ago, I wanted a nice, rich sauce to go with some hazelnut-crusted tilapia I bought. Since the fish was fairly healthy, and I had eaten pretty healthy all day, I figured I could splurge. I know I wanted creamy (dairy is my downfall!), and I knew I wanted savory, so I googled some beurre blanc recipes. I ended on this Easy Sherry Cream Sauce, which is just as simple and delicious as it sounds. It was everything I was hoping for, and this earned me a "9/10" on the Guinea Pig scale. (See About Me column.)


Ingredients:

  • 2-3 tablespoons butter
  • 2 small cloves garlic, smashed
  • 1 shallot, chopped
  • 1 cup heavy whipping cream
  • 3 tablespoons sherry
  • salt and pepper, to taste
  • Spring thyme
Melt butter in saucepan over medium-low heat. Smash garlic; add to butter. Add the chopped shallot, and saute for 1 minute. Add cream and sherry; bring to a simmer. (I simmered mine with some thyme, which I removed before serving. The taste was just faint enough.) Reduce heat and simmer for about 10 minutes until sauce reduces and nicely coats the back of a spoon. Taste and add salt and pepper.
Some people strain the sauce so you are left with a creamy sauce, and no lumps from the garlic and onions, but I chose to serve my sauce without straining it.